Is your PC feeling slow during regular browsing or when launching a heavily modded game? Many users report high memory use and spikes near 87% with games like Minecraft using many mods. This short guide shows quick, safe steps you can take right now to stabilize your system and free up RAM.
We focus on reversible changes you can make in minutes: stop unnecessary startup programs in Task Manager, use Efficiency Mode, tweak power options, and check Storage Sense. You’ll also learn when to keep security features on and when to turn off resource-heavy extras like indexing or background captures.
Expect fast wins that improve responsiveness without sacrificing essential features. Follow clear steps, verify results with built-in tools, and set a restore point so you can roll back if needed.
Key Takeaways
- Start with Task Manager to disable heavy startup programs and spot memory hogs.
- Use Efficiency Mode and power set to Best performance for short, safe boosts.
- Adjust storage and move the OS to an SSD for faster boot and load times.
- Reduce visual effects and turn off background captures to lower RAM use.
- Scan for malware, update drivers via windows update, and enable System Restore before changes.
Understand the goal: faster, smoother Windows 11 right now
High memory use during light browsing or when launching modded games often means your system is doing work you don’t need. The goal is simple: reduce background work so the operating system focuses on the apps you use most.
Quick wins first:
- Disable unnecessary startup programs to free RAM and CPU cycles.
- Turn on Efficiency Mode or change power options to push resources where needed.
- Trim visual effects and set Storage Sense to clean temp files on a schedule.
Make targeted settings changes, then check Task Manager to verify real-time gains. Keep security intact by leaving essential updates and antivirus enabled. If a change feels wrong, use the restore point or revert to default settings.
These steps work across common workflows—browsing, office apps, light media editing, or gaming—and give visible results in a short time.
Windows 11 performance tweaks
Small, targeted setting edits can make your system feel noticeably snappier in minutes. Start with changes that stop background work and free RAM, then measure results so you know what actually helps.
What to tweak first for the biggest gains today
Disable unnecessary startup programs in Task Manager so fewer apps launch at boot. Turn on Efficiency Mode for heavy apps and set Power mode to Best performance when you need speed.
Reduce visual overhead in Performance Options and turn off transparency. Enable Storage Sense to clean temp files and reclaim disk space. If search is slow on this version, try narrowing or disabling indexing to test impact.
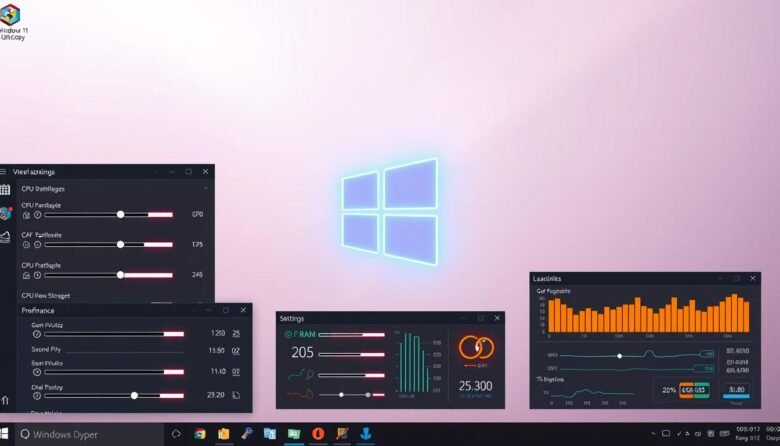
How to measure improvements with Task Manager and real-world tasks
Use Task Manager’s Processes and Performance tabs to record CPU, memory, disk, and drive activity before any change. Launch a browser or a game, note app launch times, then apply one tweak at a time and compare results.
- Set Update active hours to avoid restarts during work.
- Keep a short list of changes so you can undo anything that hurts stability.
- Focus on the combination that speeds everyday tasks, not just synthetic scores.
Tame startup and background apps using Task Manager
Many apps quietly start with your system and drain CPU and memory before you open a single file. Use Task Manager to spot what really needs to run and what can wait.
Disable unnecessary startup programs in the Startup tab
Open Task Manager and switch to the Startup tab to see programs that launch with windows. Identify nonessential entries and disable them with the disable button.
Use Efficiency Mode to reduce background resource usage
For programs you must keep, enable Efficiency Mode from the Processes view. This throttles CPU and reduces power use while keeping apps available.
Turn off app suggestions and tips to cut background noise
Disable suggestions and tips in Settings to stop extra background tasks and pop-ups. Restart once after changes and time how fast the desktop and file browsing feel.
- Check for duplicate updaters or launchers and keep only one active.
- Revisit Task Manager after a few days to ensure disabled items stay off.
- Leave rarely used apps disabled at startup and launch them manually when needed.
Dial in power settings for best performance
When you need raw responsiveness, changing the power profile is a quick, effective step. This shifts system priorities so active tasks get more CPU time and latency drops for interactive apps.
Switch Power mode to Best performance in System settings
How to change the power mode
Open Settings and go to System > Power. Find the Power mode drop-down and pick Best performance. This option favors speed over energy savings while plugged in.
- Use Best performance on a plugged-in laptop or a desktop for steady frame pacing and faster app launches.
- Test your normal workload—browser tabs, office apps, or a game launcher—to confirm reduced stutter and quicker window switching.
- If fans spin up more, check temps; higher cooling activity is normal under this mode.
- Pair the change with trimmed startup items so added power benefits active programs, not background clutter.
- If a specific app becomes unstable, step down to Balanced and test before deeper troubleshooting.
Speed up storage with Storage Sense and indexing changes
Freeing up disk clutter can make everyday tasks and game installs finish noticeably faster. Small, automatic cleanups keep files tidy so apps and large installs move without pause.
Turn on and customize Storage Sense:
Go to Settings > System > Storage and toggle on Storage Sense to auto-delete temporary files and recycle bin contents. Pick a cleanup schedule—every day, week, or month—and choose which file types to remove.
When and how to change indexing
If you see constant disk activity, narrow the indexing scope first. Exclude folders with many tiny files or large archive folders to cut background I/O without losing useful search results.
- Measure with Task Manager’s Disk graph before and after to spot improvement.
- Keep an eye on free space; low free space can slow updates and file moves.
- For gaming, regular temp cleanup helps patch installs and content extraction on both SSD and HDD.
Reduce visual overhead in Performance Options
A few clicks in the Performance Options dialog can turn off costly visual effects and sharpen responsiveness. This is a low-risk change that often yields a noticeable UI boost on older GPUs and integrated graphics.
Use Adjust for best performance to disable heavy visual effects
Open the Performance Options box from Control Panel or search and choose Adjust for best performance. That single setting disables most animations, shadows, and other costly features.
Turn off transparency effects for an extra boost
Also toggle off transparency effects in system settings to cut GPU work. You will see smoother window resizing, faster alt-tabbing, and cleaner desktop navigation.
- Try the all-off default, then re-enable a few favorite effects if the look feels too stark.
- Pair this with higher power mode to compound gains for active apps.
- Apply the same options across user accounts to keep behavior consistent.
- Use the button in the dialog to revert easily if you need the original features back.
- After applying changes, test scrolling on a heavy page and moving large windows to feel the improvement.
Keep Windows and drivers updated the smart way
Smart update settings ensure drivers and fixes arrive without derailing your workflow. A quick check now can stop surprise restarts and keep your device stable.
Go to Settings > Windows Update and click the Check for updates button to pull in fixes, stability improvements, and security patches. In Advanced options, set Active hours so installs and restarts don’t happen during your prime time.
Use Windows Update and Advanced options without interrupting work
Adjust Active hours and pause updates briefly if you are mid-project. Resume later so critical updates still apply.
Tell Windows Update to update your drivers
Enable driver updates from the same Windows Update area to get newer GPU, chipset, and device drivers without extra tools.
- Back up important files before major version changes to guard against rare issues.
- Review optional updates for targeted drivers that may fix a specific device hiccup.
- Install updates while plugged in and when you have time, then reboot once to complete installs.
Pro tip: Search for known issues tied to a version before installing on mission-critical systems to avoid regressions.
Protect performance with trusted security tools
Good security habits stop small threats from turning into big slowdowns that eat RAM and CPU. Built-in checks and a trusted on-demand scanner keep your system clean without adding extra background load.
Run Windows Security and consider Malwarebytes scans
Open the built-in tool to confirm real-time protection is on and that definitions are current. Quick checks reduce the chance of malware slowing your device.
- Confirm real-time protection and update definitions before each scan to catch new threats.
- Schedule quick scans weekly and a full scan monthly so threats don’t monopolize CPU, memory, or disk.
- Use Malwarebytes as an on-demand scan when sudden slowdowns or odd file activity appear.
- Avoid overlapping security software that fights for resources; keep tools lightweight and compatible.
- If items are quarantined, review and restore only trusted files; leave unknowns isolated.
After cleaning, reboot and recheck target apps. A clean, protected install is less likely to suffer random slowdowns from malicious processes or unwanted background services.
Gaming-focused tweaks that actually help
A single misbehaving background service can ruin a multiplayer match with stutters and input lag. This short section lists simple, testable changes you can make before blaming the title or your hardware.
When to turn Game Mode on—and when to turn it off
Test Game Mode both ways. In some rigs it smooths frame pacing; in others it adds instability. Try one match with it on and one with it off to see which gives steadier frame times.
Disable Enhanced Pointer Precision for consistent mouse control
Open Control Panel > Mouse > Pointer Options and turn off Enhanced Pointer Precision. This removes acceleration so aim and flicks feel consistent across titles and setups.
Prioritize your GPU per title in Graphics settings
Go to Settings > System > Display > Graphics and assign High performance to each executable. This forces the dedicated GPU to run a game on your device when needed.
Disable background captures in Gaming settings
Turn off “Record what happened” in Settings > Gaming > Captures to stop extra disk writes and CPU use while you play. Also close unneeded launchers and overlays; they can raise input latency.
- Keep your graphics driver current via Windows Update or the vendor tool, then retest a title that stuttered.
- Use search to jump to mouse or graphics options fast between matches.
- On laptops, plug in and set higher power before long sessions to maintain clocks and avoid dips.
- If issues persist, try windowed vs. fullscreen and toggle V-Sync or frame options in the game’s box to find the smoothest result.
Advanced options: VBS, indexing scope, and maintenance time
Some security features run virtualized services that can add measurable overhead to heavy gaming sessions. Use these advanced options carefully so your device stays both fast and safe.
Disable VBS safely if you need maximum frames: Turn off Core Isolation’s Memory integrity in Security settings, then reboot. As an alternative, uncheck Microsoft Defender Application Guard, Virtual Machine Platform, and Hypervisor Platform in Windows Features to reduce virtualization overhead.
Set a daily maintenance time: Schedule updates, indexing, and cleanup to run when you’re away. Pick a time that won’t interrupt work or a long gaming session.
- Narrow indexing scope—exclude large, seldom-searched folders to cut background churn on files and drive activity.
- After turning off VBS, reboot and test a demanding game to confirm the uplift on your system.
- Document changes, keep backups, and re-enable security features after tests or tournaments.
- If you rely on virtualization for work, keep needed features and optimize elsewhere to preserve compatibility.
Hardware win: move Windows to an SSD for instant responsiveness
Swap your system disk to an SSD and you will notice the change immediately. An SSD boots windows in about 10–13 seconds versus 30–40 seconds on a traditional disk. Game level loads can be less than half the time on the new drive.
Plan the migration: back up key files and confirm the SSD has enough storage for the OS and active datasets. Use reputable cloning software to copy your system disk so you avoid a full reinstall.
- Shut down, swap the drives, then press the boot selection button or set the SSD first in firmware.
- After booting from the SSD, verify TRIM is enabled and that the storage controller uses the correct driver for best performance.
- Move frequently used apps and files to the SSD; keep large archives on a secondary drive to balance speed and capacity.
Keep free space on the SSD to maintain steady speeds during updates and installs. On laptops, double-check power plans after the swap so the new drive isn’t throttled by aggressive efficiency settings. Retire the old disk as a backup or bulk storage once you confirm stability.
Troubleshooting high RAM usage in the present day
When tabs and a game suddenly push RAM near full, start with a quick, targeted check so you can act without guessing. A few small steps often free dozens or hundreds of megabytes and stop stutter.
Identify browser and game memory spikes with Task Manager
Open Task Manager and sort by Memory to see which processes and apps use the most RAM. Look for browsers, launchers, or helper programs that spike when you load a page or start a modded title.
Close or remove heavy extensions and background processes
- Disable or remove browser extensions that keep many tabs alive; ad blockers and video helpers often consume large memory pools.
- Close duplicate launchers, overlays, and helper programs; each extra process can tie up hundreds of megabytes.
- Stage mods for games: enable groups of mods to isolate offenders instead of loading all at once.
- Set updaters and helper apps not to auto-start with windows so they don’t run quietly in the background.
- Save large captures and files to a fast drive to reduce paging and keep system resources free during heavy use.
Extra checks: If unknown processes persist, run a Malwarebytes scan to find unwanted software. Try a different browser type or a fresh profile if one tab or page type keeps exploding memory. Re-test after each change so you know which step actually lowered memory pressure.
Lock in stability with System Restore and sensible defaults
A quick restore point gives you a safety net when experimenting with settings or drivers.
Turn on System Restore so you can roll back fast if a driver, update, or setting causes instability in your system. Create a restore point after your cleanup pass; that snapshot becomes your new default state and is reachable with a single button click.
Document changes you make to settings and startup programs so you can undo only the one that introduced the issue. Ensure the restore config includes the system drive and enough disk space for useful snapshots.
If an update or version break occurs, use the restore dialog box carefully. Read the summary, then confirm to return to the intended state. Pair restore points with regular backups of important folders and a full drive image for extra security.