Sudden frame loss can feel random, but it usually traces back to one clear bottleneck in your system.
Think of a game like a factory line: the cpu handles logic, the gpu paints each frame, RAM holds active data, and storage streams assets. A stall at any stage makes gameplay jumpy even if peak fps looks high.
Start by watching live metrics: GPU usage under 95% and temps below 80°C are healthy, while CPU cores should stay under 90% to avoid throttling. RAM and VRAM headroom matter too; lack of memory causes stalls when assets stream in.
The single most common cause of sudden drops is thermal throttling, especially on laptops. A fast diagnostic step is simple: monitor temps and clocks, spot the bottleneck, apply a targeted fix, then verify stability.
Key Takeaways
- Consistent frame times matter more than peak fps for smooth play.
- Thermal throttling is the most frequent cause of sudden frame loss.
- Monitor GPU/CPU usage, temps, and clocks as your first step.
- Keep RAM and VRAM under 80–90% to preserve headroom.
- Diagnose the bottleneck, fix it, then verify to avoid repeat issues.
What sudden FPS drops really mean right now
When a game stutters unexpectedly, it’s rarely random—your hardware is signaling where the problem lives.
Consistency matters more than peak numbers. Smooth frame times feel better than spiky fps that jumps around. Watch how your system behaves the instant a hitch shows up.
Some quick cues point to the limiter. If lowering resolution instantly raises frame rate, the gpu is likely the bottleneck. If GPU usage stays low while one core hits 100%, the cpu or main game thread is struggling.
- Thermal throttling: good play at first, then falling clocks and lower fps after temps climb above safe limits.
- RAM/storage strain: texture pop-in, long pauses when loading new areas, and near-max memory usage.
- Monitor and refresh rate affect feel, not the root cause; poor pacing can make normal dips look worse.
Use repeatable scenes in the same game to measure changes and tie every hitch back to usage and temps. That stops you from chasing random issues and targets the right fix fast.
FPS drops troubleshooting: identify your bottleneck before you fix it
Begin with live metrics so you can spot which component is getting overwhelmed. Gather usage, temps, and clock data before changing graphics settings or drivers.
Monitor the right metrics
Watch GPU and CPU usage, per‑core load, clocks, and temps. Aim for GPU usage under 95% and temps below 80°C. Keep CPU cores under 90% and package temps under 95°C. Track RAM under 80% and VRAM below 90% to avoid asset swaps.
The 30-second resolution test
Run a quick step: drop resolution (for example 1080p ➜ 720p) for 30 seconds. A big fps jump means the gpu is limiting performance. Little change points to a cpu or main thread limit.
Read the symptoms and use tools
- One core pegged at 100%? Likely a processor bottleneck in crowded scenes.
- High GPU usage and strong response to graphics settings? GPU-bound.
- Clocks falling as temps rise? That flags thermal throttle.
- Stutters with texture pop‑in point to RAM/VRAM or storage strain.
Use Windows Task Manager, HWiNFO64, Core Temp, and RTSS overlays to log frame times and max values. Repeatable tests plus logged steps confirm whether a change actually improves performance.
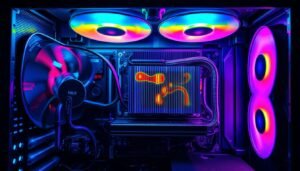
Thermal throttling is the top culprit—check temps and cool first
Heat is often the silent cause behind sudden performance changes in games. Before changing settings or drivers, confirm temperatures and clocks while playing the same scene for 10–20 minutes.
Safe temps and when throttling begins
Watch CPU package temps; keep them under 95°C to avoid hard throttle. Aim for comfort under ~85°C.
For GPUs, target under 85°C. NVIDIA can start limiting clocks from ~65°C with hard ceilings near ~83°C, while AMD hotspots tolerate higher limits.
Quick wins to drop heat
- Power off, open the case, use compressed air, and clear filters—holding fan blades still while cleaning.
- Confirm fans spin freely; faulty ramp behavior points to a control or BIOS profile issue.
- If thermal paste is older than two years, plan a refresh and consider a better cooler or more case fans.
Undervolt and laptop basics
Use MSI Afterburner for a gentle GPU curve and Intel XTU or ThrottleStop for the CPU to lower temps without visible loss in frame pacing.
For laptops, always plug into wall power with the original adapter, enable the correct power mode, and elevate the rear to improve airflow while gaming.
When the CPU is the bottleneck: reduce background load and CPU-heavy settings
If your processor is maxing out, the game will stutter even when the GPU looks fine. Focus on freeing CPU cycles before changing heavy graphics options.
Windows tweaks
Switch to a High Performance power plan and enable Game Mode so the system prioritizes your game over background tasks. Turn off Fullscreen Optimizations for the game executable.
- Disable overlays (GeForce Experience, Discord, Steam) to reduce hooks that cost CPU time.
- Use the built-in power mode and ensure the adapter and battery profile favor performance.
Task Manager cleanup
Open the Task Manager and close resource-heavy background apps like Chrome, Spotify, or chat clients. Then go to Startup and disable items that auto-launch and steal cycles mid-match.
In-game settings that hit the CPU
Lower view distance, shadows, population density, physics, particle effects, and audio quality first. These settings reduce main-thread work and lift 1% lows for smoother fps.
Memory configuration
Enable XMP/DOCP in BIOS and use dual-channel RAM (2x sticks) to boost processor memory bandwidth. Clear standby memory with a tool like ISLC and install games on an SSD to cut CPU wait time.
Re-test after each change to confirm better frame pacing and fewer mid-game issues.
If you’re GPU-bound: tune graphics settings and drivers for stable frames
If the graphics card is working hardest, tuning render load and drivers is the fastest way to steady frame times. Start by lowering the biggest offenders and use upscaling tech before cutting quality across the board.
High-impact graphics settings to lower first
Resolution, ray tracing, shadows, and anti-aliasing move the needle the most. Ambient occlusion is next. Reduce these in order to regain noticeable fps and smoother pacing.
Driver hygiene and control panel tweaks
When problems persist, run DDU in Safe Mode for a clean uninstall, then install the latest driver. In NVIDIA Control Panel pick Prefer Maximum Performance and set Texture Filtering to High Performance. For AMD, enable Anti‑Lag, turn Chill and Boost off, and use the latest Adrenalin build.
Use DLSS, FSR, or XeSS first
Enable DLSS/FSR/XeSS in Quality mode to render fewer pixels with minimal visual loss. Keep texture quality high unless VRAM tops ~90%. On laptops, force the high‑performance GPU in the vendor app so games use the discrete card.
- Retest the same scene after each change to confirm real gains in performance.
- Use an fps cap later to lock consistent frame times after tuning.
RAM, VRAM, and storage: fix stutters, texture pop-in, and freezes
Stutters in open-world scenes usually point to asset streaming or memory headroom running out. Watch RAM and VRAM usage during problem areas so you can spot when the game begins swapping or dropping textures.
Watch memory headroom and texture trade-offs
Keep system RAM under ~80% and VRAM below ~90% to avoid mid-game pauses. If VRAM hovers near 90%, drop texture quality one notch first to preserve visuals while smoothing frame pacing.
Install on SSD and manage drives
Always install demanding games on an SSD. Moving from an HDD to an SSD often removes traversal hitches and reduces low fps dips in large maps.
- Trim SSD/NVMe periodically; reserve defrag for HDDs only.
- Pause background downloads and cloud sync to cut disk contention.
- On laptops, keep ample free SSD space so thermal limits and write amplification don’t throttle streaming.
Shader compilation and caches
Expect first-time shader compilation stutter in some engines. Let the game precompile shaders in menus or use a practice mode until busy areas are cached.
Do not purge shader caches between sessions unless you are explicitly troubleshooting; caches prevent repeat stalls.
- Enable dual-channel memory for better CPU throughput if RAM is tight.
- After moving a game to an SSD and adjusting textures, re-run your test route to confirm pauses and pop-in are fixed.
Smoother feel with frame pacing: refresh rate, FPS caps, and sync tech
Matching your render output to your monitor’s rhythm fixes many feel problems. A steady frame cadence reduces the sensation of stutter more than chasing a higher counter.
For the best feel, pair a G‑Sync or FreeSync monitor with a compatible gpu and enable any low‑latency modes like Reflex or Anti‑Lag. Then cap your fps 2–3 frames below the display refresh rate (for example, 144Hz → 141).
Where to place the cap
Pick the cap location that gives the most consistent frame times for your setup.
- Use the in‑game limiter when it is stable and predictable.
- Use RTSS for precise targets or when the game’s limiter is flaky.
- Use a control panel cap for a simple global setting across games.
V‑Sync and competitive exceptions
Keep V‑Sync off if you rely on G‑Sync/FreeSync plus a cap. Enable V‑Sync only when frames can exceed the refresh window and you see tearing.
Competitive shooters sometimes accept higher uncapped rates for lower latency, but most players benefit from steady frame pacing over raw peaks. In Windows, avoid forcing global V‑Sync so each game can use the best graphics mode for smooth performance.
Advanced steps when drops persist on a good PC
When a well-built rig still hiccups, it’s time for deeper system-level checks. These are escalation steps for persistent issues after basic fixes.
Driver and BIOS deep fixes
Do a clean driver slate: download DDU and the latest GPU driver, boot Safe Mode, run DDU and choose “Clean and restart,” then install the fresh driver and reapply your graphics control preferences.
Update your motherboard BIOS to enable Resizable BAR, Above 4G, and set PCIe Gen correctly for your gpu and NVMe drives.
Enable XMP/DOCP to ensure memory runs at rated speed and verify modules are in the board’s recommended slots (often 2 & 4).
Low-level toggles and game integrity
Consider advanced BIOS toggles—disabling HPET, C‑States, or Spread Spectrum—only after research. Always have a CMOS reset plan before changing firmware options.
- Verify game files via the launcher; repair first, then reinstall if corruption persists.
- Keep Windows and the game updated so scheduler and driver models match current hardware.
- Check SSD SMART and run MemTest to rule out hardware faults masquerading as performance issues.
Rerun a controlled test scene after each step to confirm which change fixed the problem. These steps are an escalation for stubborn cases on well-tuned systems.
Lock in stable performance going forward
Locking in stable play starts with a short, repeatable checklist you run each month.
Update your graphics drivers and apply Windows updates. Clean dust filters and verify fans so heat does not return and harm performance.
Check temps while you play. Run SSD health checks and keep some free space. Move old, non-latency games to an HDD if needed.
Review startup apps quarterly to stop background processes from stealing CPU time. Revisit your power plan after big updates so the system stays set for performance.
Keep a short doc of your preferred settings and use “change one thing, test” whenever you update drivers or install a new game. Small routines prevent recurring fps drops and let you focus on playing.